

Hi everyone!
I have a super easy paper crafting project for you today!
I recently purchased a kikki.K personal planner! I love my new planner, but I didn’t love the dividers that came with it. I’ve seen so many cute handmade dividers online, so I decided to make some myself!

Here’s a little sneak preview of the finished product!

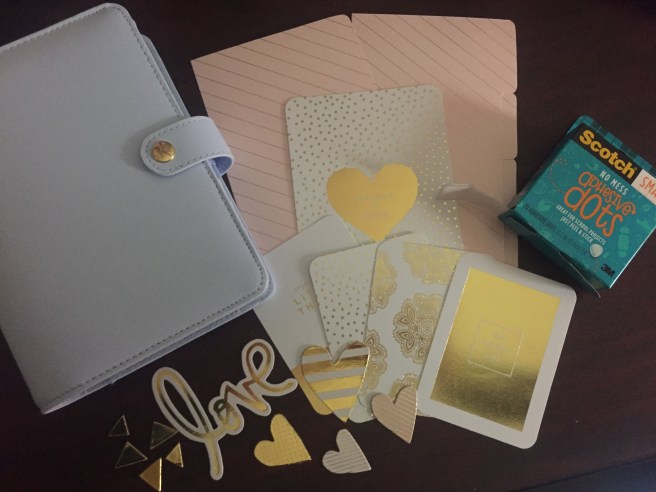
Supplies:
- Large paper dividers or file folders
- Paper cutter
- Glue dots
- Pencil
- Scissors
- Dividers that already fit your planner
- Decorative papers and appliques
- 6-hole punch (find one here)
The dividers I have came with seven tabs. I knew I only wanted four tabs for my dividers, so I had to make a few adjustments to make the dividers fit and not look awkward!

You’re going to start by tracing your first divider onto one of the large file folders.

Leave a little space at the bottom of the first tab.

Take the next divider “in line” and scooch it up a little to create a larger tab for your first divider. Finish tracing the rest of the tab.

This is actually a picture of the second divider, but you can still see what the divider tabs should look like.
Once you have the dividers drawn out, cut them with your paper cutter. I cut all the straight edges first.

At first, I wasn’t sure how I was going to cut the tabbed side of the divider. I decided to cut part of it with the paper cutter and the actual tab area with a pair of scissors.
While using the paper cutter, I had to be very careful not to accidentally slice my tab right off! To avoid that happening, I stopped the paper cutter about half an inch from the tab on each side. I then finished cutting it with some scissors.
Getting the inside corners perfectly rounded was pretty tough, but I think I managed okay!

Here are all the cut out dividers!
You may have noticed that there are five papers in the picture! About halfway through my project, I decided to make a dashboard to match my dividers!
To make the dashboard, just line up all of your original dividers, trace around them, and then cut it out! It’s super easy!
I love the striped, metallic dividers, but I wanted to add a little something else to them!
I found these fun Project Life cards and cardboard appliques at Hobby Lobby. When I saw them, I knew they’d be perfect for this project!

I played around with a few different design options.

Here’s what I decided on!

I used some adhesive, glue dots to attach all of the decorative items. I’m rather heavy handed with every kind of adhesive, so you may not find this many glue dots necessary! 🙂

Now it’s time to punch the holes! Once all of the holes are punched, your dividers are complete!

Here are all of the finished dividers!
Aren’t they so cute?! I love the light pink with all of the gold accents! So classy!

I absolutely love the way the dashboard and dividers look with my light blue planner and matching, pink planner clips!
I hope you’ve enjoyed this little tutorial!
Happy Crafting and Happy Planning!
