

Hello Crafters!
I have a super easy, super fun, and super cute DIY project to share with you today!

Supplies:
- Felt Balls (I bought this pack on Amazon)
- Twine
- Sharp scissors
- Large eye needle
- Clear nail polish (optional)

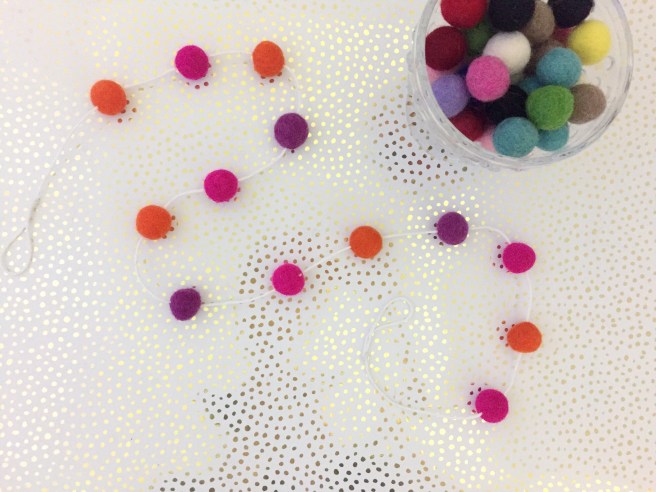
The felt balls I purchased are a grab bag of 50, so I had no idea what colors I was going to get until I opened the package.
1) Separate your felt balls by color
This will make it much easier to see what colors you have and what color scheme you want for your garland.

2) Choose your garland color
After looking at my color choices, I chose orange, purple, and pink for my first garland.

3) Lay your balls out in some sort of pattern
I chose an alternating pattern, because my choices were limited by the number of purple balls I had.

4) Thread your large eye needle with twine
I chose white twine for this garland, because I thought it would go best with my color palette.

5) Begin stringing your garland
I eyeballed where I thought the middle of each pom pom was and threaded them accordingly. If your balls aren’t perfectly centered, that’s okay! I know that a few of mine are a little wonky! That just adds a littler personality to the project! 🙂

6) Keep on threading

Once all your pom poms are threaded, we’re going to tie off the garland.
7) Create a small loop at the end of your garland
You can either cut your twine before or after creating your loop. I cut my thread after just in case something went wrong with the string or loop.

8) Tie a knot to create a small loop for hanging your garland
9) Cut off the excess twine

10) Do steps 7-9 again to create another loop on the other side of the garland
(Optional step) 11) Paint your knots with clear nailpolish
I like to paint my knots with polish to insure that they don’t come untied at any time.
12) Enjoy your pretty new garland!

After looking at my felt balls again, I saw that I had enough neutral ones to make another garland!

I used cream, taupe, and black for my second garland.

I went with a similar alternating design for this garland too.

In about 20 minutes, I made two very pretty, very fun garlands!
These beauties are going to be perfect for photo props, bedroom/office decor, and party decor!

I hope you enjoyed this super easy garland tutorial!
If you have any questions, feel free to leave them in the comments below!
Happy Crafting!
So cute and fun! I’m going to make this for my birthday party 🙂
Yay! That’ll be so cute! I have another pack of Pom Poms on the way and will be making another garland later this week! ✨
This is such a cute decoration to have! Plus, DIYing is always super fun! 🙂 Might try making this to decorate my room!
Yes, these garlands are THE CUTEST and DIYing is always fun! I bet one would look great in your room! 😊
So cute!
Thank you!! ❤️❤️
They look so fuzzy!
Haha yes! Some more than others! ☺️
Aw I’ve been obsessed with pom poms lately.
Yes! Me too!! They’re very fun!
This is so easy and simple I love it!!! I also like how you styled it! Gives me ideas on photos I want to do hmmmm I’m gonna have to pick me up some felt balls!!
Jasmine 🙂
colorubold.com
Yes, it’s so easy! Thank you! I think it’s going to be great for blog photos and flatlays!
This is so beautiful an easy I will try it! Thank you for sharing it!
So easy! Of course! I love sharing my crafts!